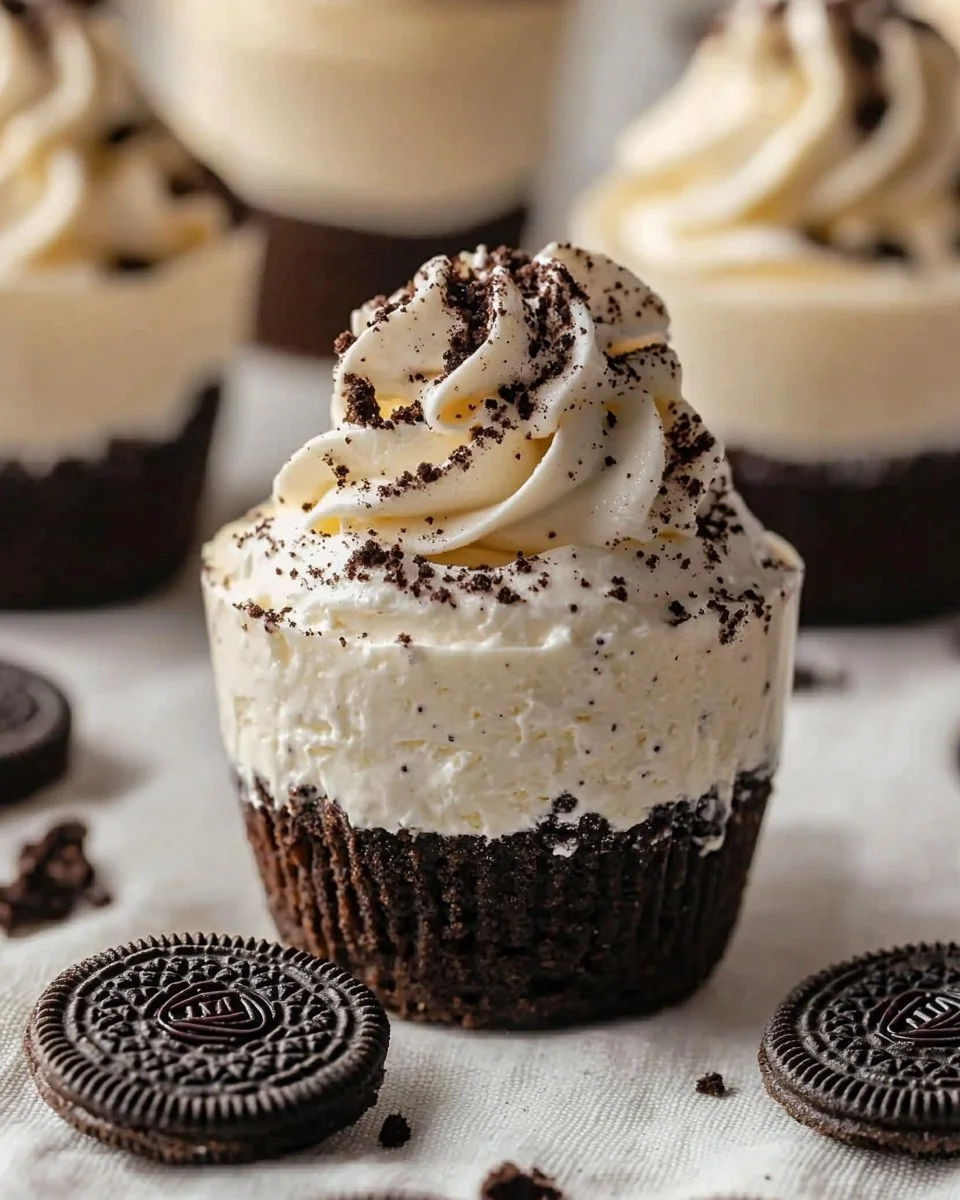
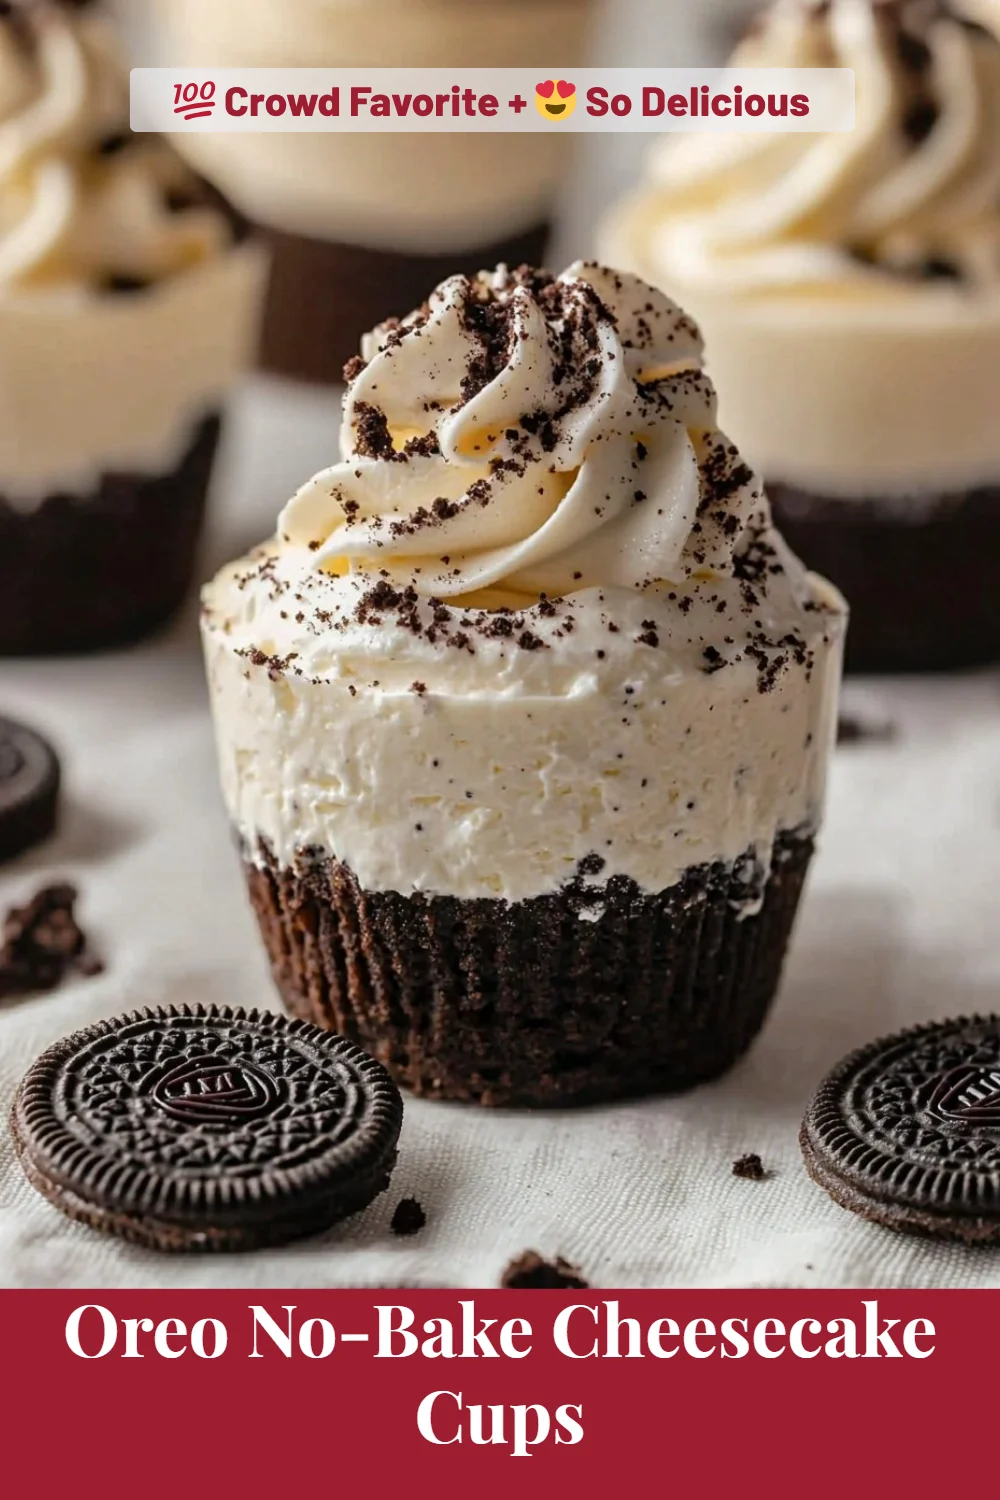
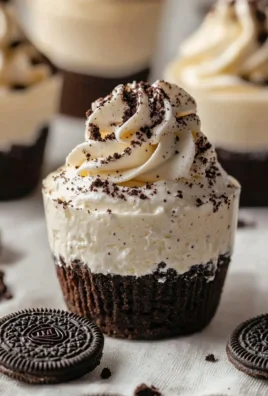
Indulging in a sweet treat that feels light yet decadent is a pleasure, and nothing captures that joy quite like the Oreo No-Bake Cheesecake Cups. In under an hour, you can whip up this delightful dessert that combines the creamy goodness of cheesecake with the crunchy texture of Oreos. It’s a foolproof recipe that requires no baking, making it accessible for anyone, whether you’re a baking novice or a seasoned pro.
This recipe is perfect for casual get-togethers, family gatherings, or simply whenever you want to satisfy your sweet tooth. The best part? You can make these cups ahead of time, allowing the flavors to meld beautifully in the fridge until you’re ready to serve.
Why You’ll Love This Recipe
- Each cup delivers a creamy, rich cheesecake filling that melts in your mouth.
- The crushed Oreos provide a satisfying crunch at the bottom.
- It’s a no-bake dessert, saving you time and cleanup.
- Versatile enough to customize with more cookie toppings or whipped cream.
What You’ll Need
Before getting started, ensure you have all the ingredients ready.
For the Cheesecake Filling
- 1 8 oz block of cream cheese, softened
- 2/3 c powdered sugar
- 1 tsp vanilla
- 1 8 oz. Cool Whip or whipped topping
For the Crust
- 24-26 Oreo cookies (more as desired)
For Serving
- Whipped cream (optional)
- Additional crushed Oreos (optional)
Use low-fat cream cheese for a lighter option.
Substitutions & Swaps
- Swap Cool Whip for homemade whipped cream.
- Use gluten-free Oreos for a gluten-free version.
- Substitute cream cheese with mascarpone for a different flavor.
- Adjust powdered sugar for desired sweetness.
How to Make It
Creating these delicious cups is simple and rewarding.
Crush the Oreos
Place the Oreos in a plastic bag and seal. Using a rolling pin or a sturdy wooden spoon, crush the Oreos into fine crumbs. Spoon 1 1/2 – 2 tablespoons of the crushed Oreos to the bottom of 6 small dessert dishes (make sure dishes are at least 3/4 cup-1 cup size). Set aside.
Whip the Cream Cheese
Using a hand or standing mixer, whip the cream cheese and powdered sugar until creamy and smooth. Add the vanilla and beat to mix in.
Fold in the Cool Whip
Gently fold in the Cool Whip to combine thoroughly. Then, fold in the remaining crushed Oreos to create a delightful texture.
Assemble the Cups
Divide the cheesecake filling evenly across the prepared dishes and gently press onto the crushed Oreos. Chill for about 1 hour or until ready to serve.
Top and Serve
Before serving, top each cup with whipped cream and more crushed Oreos if desired.
How to Store It
Fridge: store in an airtight container for up to 3 days.
Freezer: no, as the texture will change.
Reheat: not applicable; serve cold.
Tips for Best Results
- Make sure your cream cheese is completely softened for a smooth texture.
- Use a food processor for quicker Oreos crushing.
- Chill the cups longer for firmer cheesecake filling.
- Customize with your favorite toppings for extra flair.
Serving Suggestions
- Serve with fresh berries for added flavor.
- Enjoy at birthday parties or casual gatherings.
- Pair with coffee for a delightful dessert experience.

Leave a Comment